Classic Red Velvet Cake With Ermine Frosting
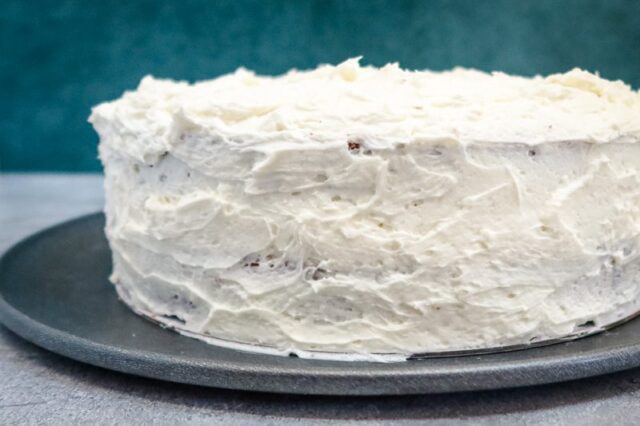
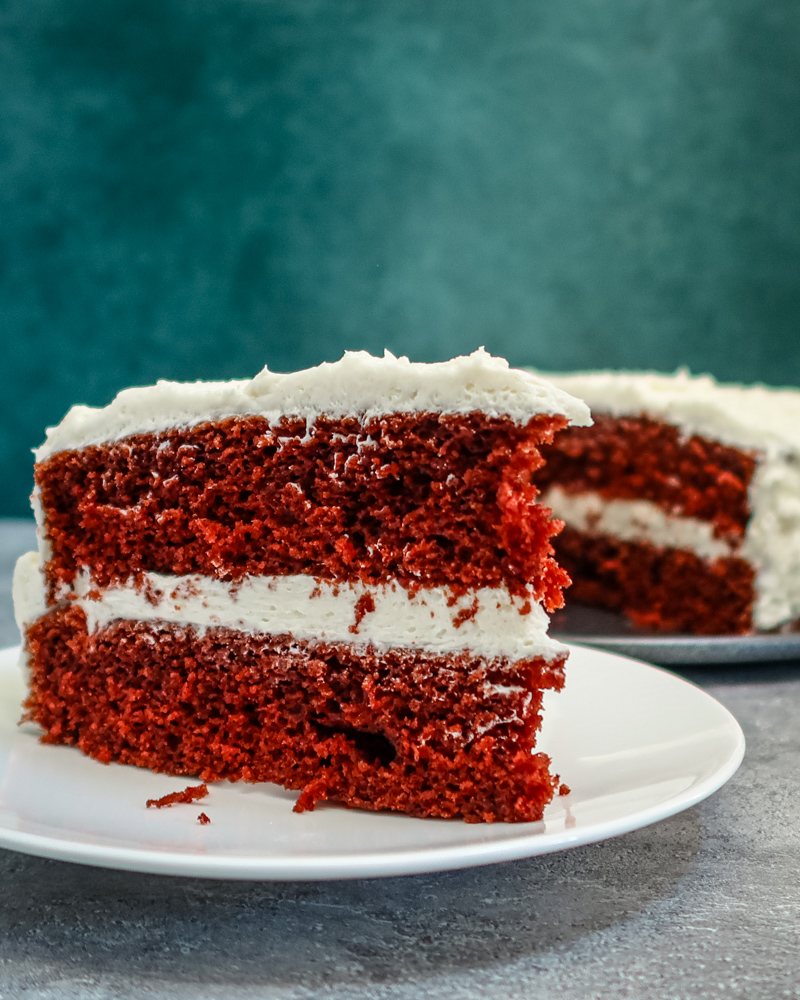
This red velvet is a traditional one made with a boiled milk ermine frosting. It’s a classic southern cake that always delights!
This post may contain affiliate links. See our Privacy Policy.
Red velvet cake is a Southern classic beloved for its striking color, tender crumb, and subtle cocoa flavor. This version stays true to tradition with a soft, velvety cake made from buttermilk, a touch of cocoa, and just enough red coloring for that iconic look. The texture is light yet moist, with a mild chocolate flavor balanced by gentle acidity from the buttermilk and vinegar—two ingredients that help give red velvet its signature taste and feel.
What truly sets this recipe apart is the ermine frosting. Sometimes called “boiled milk frosting” or “flour frosting,” ermine is the original pairing for red velvet. It’s made by cooking milk, flour, and sugar into a smooth base, then whipping it into softened butter until it becomes airy, silky, and lightly sweet. Unlike cream cheese frosting, ermine is incredibly soft, cloud-like, and delicate—perfect for spreading over tender cake layers without overwhelming them. This cake looks stunning on a dessert table and tastes even better than it looks.
Red Velvet Cake Origins
One often-repeated story credits the Waldorf-Astoria Hotel in New York City with inventing red velvet cake.
But historians think the cake was already around; the Waldorf simply popularized a restaurant version.
During the Depression, the Adams Extract Company (Texas) began selling red food coloring, vanilla, and other flavor extracts. They marketed a “Red Velvet Cake” recipe using their red food dye to create the more dramatic red color and encourage people to buy their products. Their ads helped the cake recipe spread across the South and Midwest.
The reason it is called a Southern cake is the ingredients: buttermilk, vinegar, cocoa, and soft flour. It was a special-occasion staple across the South by the mid-20th century, and Southern cookbooks embraced the recipe. Ermine frosting was often used. Cream cheese frosting didn’t become popular until the 70s or 80s.
What You’ll Like About This Dish
Authentic old-fashioned flavor. This recipe uses the classic ermine frosting—light, silky, and traditionally paired with red velvet.
Soft and velvety crumb. A combination of buttermilk, cocoa, and vinegar creates a tender, beautifully textured cake.
Impressive presentation. The vivid red layers and snowy frosting make this a showstopper for holidays and celebrations.
Not overly sweet. The mild cocoa cake and gently sweet frosting strike a perfect balance.
Ingredient Notes
- Cake flour: Essential for a fine, tender crumb; it helps red velvet stay soft rather than dense.
- Cocoa powder: Adds mild chocolate flavor—just enough to deepen the cake without making it taste like chocolate cake.
- Baking soda and vinegar: Work together to add lift and contribute to the characteristic texture.
- Butter + oil: Butter adds flavor, while oil ensures moisture to keep the layers soft.
- Buttermilk: Provides acidity and richness; crucial for the cake’s signature flavor and texture.
- Red food coloring: Gel or liquid works; adjust quantity for desired vibrancy.
- Milk and flour (for frosting): Create the base of the ermine frosting, thickening into a pudding-like mixture.
- Granulated sugar: Dissolves into the cooked mixture for a smooth frosting without grittiness.
- Butter: Must be soft for whipping; brings lightness and structure to the frosting.
- Vanilla: Rounds out the frosting’s flavor and complements the delicate cake.
Steps to Make Classic Red Velvet Cake With Ermine Frosting
- Preheat the oven and prepare two round cake pans with grease and parchment.
- Sift the flour, cocoa, baking soda, and salt together.
- Beat the butter and sugar until light and fluffy, then add eggs one at a time.
- Mix in the oil, vanilla, and food coloring.
- Add the buttermilk alternately with the dry ingredients and blend.
- Add vinegar and beat briefly to combine.
- Divide the batter between pans and bake until a toothpick comes out with a few crumbs.
- Cool in pans, then transfer to racks to cool completely.
- Prepare the ermine frosting by cooking milk, flour, sugar, and salt until thick.
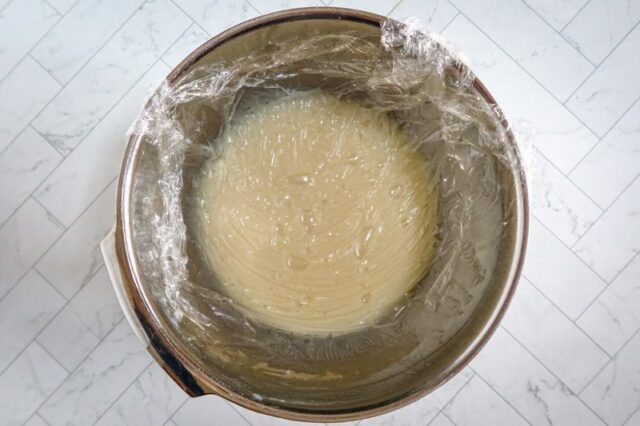
- Strain, add vanilla, and cool completely with plastic wrap pressed on the surface.
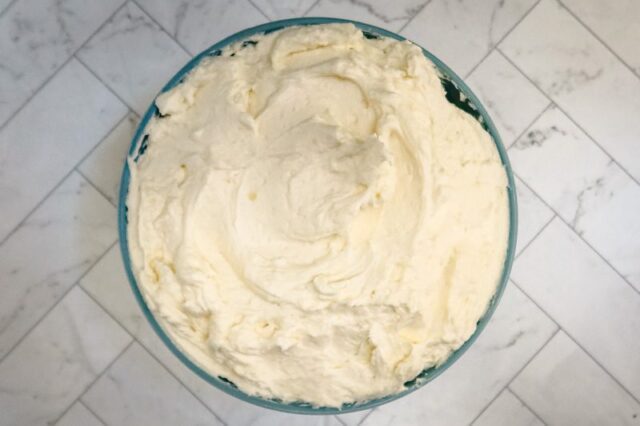
- Whip the butter, then gradually beat in the cooled mixture.
- Whisk until light, fluffy, and smooth, then frost the cooled cake.
Tips for Red Velvet Cake With Ermine Frosting
- Use room-temperature ingredients for the cake batter so it blends smoothly and bakes evenly.
- Do not overmix after adding the dry ingredients—this helps maintain the tender crumb.
- Cool the cooked frosting base fully before adding to the butter; even slight warmth can cause the frosting to separate.
- Chill the frosting briefly if it becomes too soft while whipping, then continue mixing.
- Use gel coloring if possible; it produces a deeper red with less liquid.
- For extra stability, refrigerate the frosted cake for 20 to 30 minutes before slicing.
- Make the cake layers a day ahead and wrap tightly—they slice more cleanly when slightly chilled.
Recipe Variations
- Cream cheese frosting version. Swap the ermine for classic cream cheese frosting if you prefer a tangier finish.
- Chocolate-red velvet hybrid. Increase the cocoa for a deeper chocolate flavor while keeping the signature red color.
- Two-tone frosting. Use plain ermine frosting for the center and add cocoa to a portion for chocolate accents on the outside.
- Heart-shaped cake. Bake in heart pans for Valentine’s Day or special occasions.
- Layer expansion. Split the baked layers to make a four-layer cake with thinner frosting layers in between.
- Berry-topped red velvet. Add fresh strawberries or raspberries to the top for color and brightness.
- Mini red velvet cakes. Bake batter in small pans or ramekins for individual servings.
What to Serve With Red Velvet Cake
- Serve with coffee, tea, or a glass of milk to complement its sweetness.
- Pair with fresh berries or a fruit coulis for a colorful touch.
- Add a sprinkle of chocolate shavings or red velvet crumbs over the frosting for decoration.
- Choose a side of vanilla ice cream for a classic, crowd-pleasing combination.
How to Store Red Velvet Cake With Ermine Frosting
Refrigerate: Store the frosted cake in the refrigerator, loosely covered, for 3 to 4 days. The frosting stays stable but benefits from being chilled.
Room temperature: If your kitchen is cool, the cake can stay out for short periods, but return leftovers to the fridge.
Freeze: Freeze unfrosted cake layers tightly wrapped for up to 2 months. Thaw completely before frosting.
Frosting storage: Ermine frosting can be chilled and re-whipped if it becomes too soft—just bring to cool room temperature before beating again.
Classic Red Velvet Cake With Ermine Frosting
Ingredients
For the Red Velvet Cake
- 2 ¾ cups cake flour, 348 grams
- ¼ cup cocoa powder, 22 grams
- 1 teaspoon baking soda
- ½ teaspoon salt
- ½ cup unsalted butter, (113 grams), room temp
- 1 ½ cups sugar, (300 grams)
- ¾ cup vegetable oil, (150 grams)
- 3 large eggs
- 1 cup buttermilk, (8 ounces)
- 1 tablespoon vinegar
- 2 teaspoons vanilla
- 1 tablespoon red gel food coloring or 2 tablespoons liquid
For the Ermine Frosting
- 1 ½ cups milk, (12 ounces)
- ½ cup all-purpose flour, (64 grams)
- 1 ½ cups granulated sugar, (300 grams )
- ¼ teaspoon salt
- 1 tablespoon vanilla
- 1 1//2 cups unsalted butter, (339 grams), room temperature
Instructions
- Heat the oven to 350 F.
- Lightly spray 2 9-inch round cake pans with cooking spray and line them with cut-out rounds of parchment paper. Set aside.
- In a medium bowl, sift together the flour, cocoa powder, baking soda, and salt; set aside.
- Combine the butter and sugar in a large mixing bowl with an electric mixer (stand mixer if possible); beat until light and fluffy.
- Add the eggs one at a time, beating thoroughly after each addition.
- Beat in the vegetable oil, vanilla, and food coloring.
- With the mixer on medium speed, beat in the buttermilk and dry ingredients until blended.
- Add the vinegar and beat on low speed until blended.
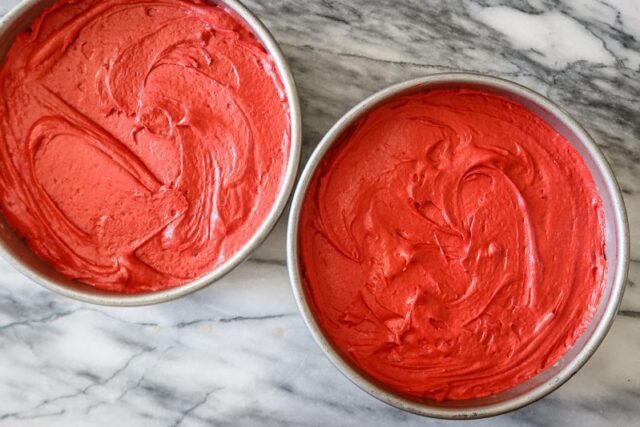
- Divide the mixture between the two prepared cake pans.
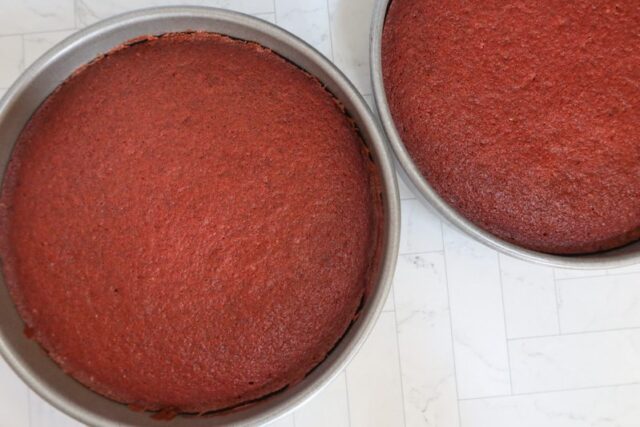
- Bake in the preheated oven until a toothpick inserted in the center comes out with a few crumbs clinging
- Cool in the pans for 10 minutes, then remove to a rack to cool completely.
Prepare the Frosting
- Place a mesh strainer over a bowl and set aside.
- Combine the milk and flour in a saucepan or saucier and whisk until smooth. Place the pan over medium heat and cook while whisking constantly until it begins to thicken, about 2 minutes.
- Add the sugar and whisk to blend. Continue cooking and whisking until the mixture is bubbling and pudding-like in thickness, about 5 to 7 minutes longer.
- Pour the hot mixture through the strainer into the bowl and whisk in the vanilla.
- Place a sheet of plastic wrap directly on the surface of the hot mixture to prevent a skin from forming.
- Let it cool completely. Place the bowl in a larger bowl with some ice water for quicker cooling.
- Beat the butter until light and fluffy, then beat in the cooled flour mixture a little at a time.
- Switch to the whisk attachment and continue beating for 3 to 4 minutes until light and fluffy.
- Frost the cake.
Nutrition
Disclaimer:
Our nutritional information is based on a third-party application that analyzes the ingredients list to determine the values. The information is meant to be helpful, but should be considered an estimate. Values may differ depending on measurements, brands, serving variations, and database availability.

